Close

Honey-Cinnamon Ice Cream

You’ll scream for this ice cream recipe…

I decided to attempt another dessert for this week’s post. (God forbid I post another kind of soup!) This blog was seriously lacking in sweets, and what is a more classic summer treat than ice cream? Not only is there a considerable amount of history behind the origins and evolution of ice cream, but there is also some awesome science behind how it is made as well.

In all fairness to my love of soup, though, for most of my childhood, I used to drive my step-dad crazy by mashing and stirring my ice cream into a melted, soupy mess. He always preferred his ice cream to be so rock-hard that it was nearly impossible to even scoop out of the container. I suppose you could say that I finally grew out of playing with my food. Although, I consider this food blog nothing more than a formal examination of how people throughout history have played with food and created time-tested favorite dishes and masterpieces.

Anyhow, here’s your food lesson for the week:

The custard mixture must be scalded twice before freezing.

The custard mixture must be scalded twice before freezing.

The speculated origin for ice cream is China, but the actual time period is a bit fuzzy. Of course, numerous myths surrounding the origin of ice cream muddy the waters even further. As with most mainstream foods today, ice cream began as a nearly unattainable food item for only the wealthy and royal.

The biggest challenge to the spread of ice cream recipes and, therefore, its popularity, was the ability to obtain ice and then preserve it. Special icehouses were created to store ice that was collected from bodies of water and areas of high elevation during colder seasons. Here, they were stored within layers of straw and other crude, naturally occurring insulation, where the ice would usually remain frozen throughout the warmer seasons, preserving perishable food and serving as a way for people to cool drinks or make frozen treats.1

As global travel and exploration spread, so did cultural and religious beliefs. Along major trade routes, various ingredients and culinary methods and traditions followed as well.

A man in Naples, Italy, named Antonio Latini (1642–1692) was the first person to record a recipe for sorbetto (or, as we know it, sorbet). He is also credited by many food historians as the creator of a milk-based sorbet, which is considered the first “official” ice cream.2

The Kitchen Aid ice cream attachment really simplifies the churning process.

The Kitchen Aid ice cream attachment really simplifies the churning process.

Eventually, nested containers were used to freeze the custard, yet keep it contained away from the ice. Rock salt became an integral part of this process as well. Why? It has a funny way of lowering the freezing point of water. Salt is used in the outer chamber of these ice cream makers to cause chemical reactions, which melt the ice and freeze the custard.3 The warmer cream mixture essentially gives up its energy (heat) causing it to slowly freeze. The ice absorbs this heat energy via an endothermic reaction, causing it to melt. Thank you for the ice cream, science!

After arriving in the Americas (with its first mention in the 1700s), ice cream caught on with presidents and aristocracy alike.4 Industrialization eventually blessed us with reliable methods of refrigeration, which allowed the masses to enjoy this creamy, refreshing treat. Americans took it and ran, creating all manners of ice cream including sundaes, cones, sandwiches, ice cream sodas, baked Alaska, and the list goes on and on.

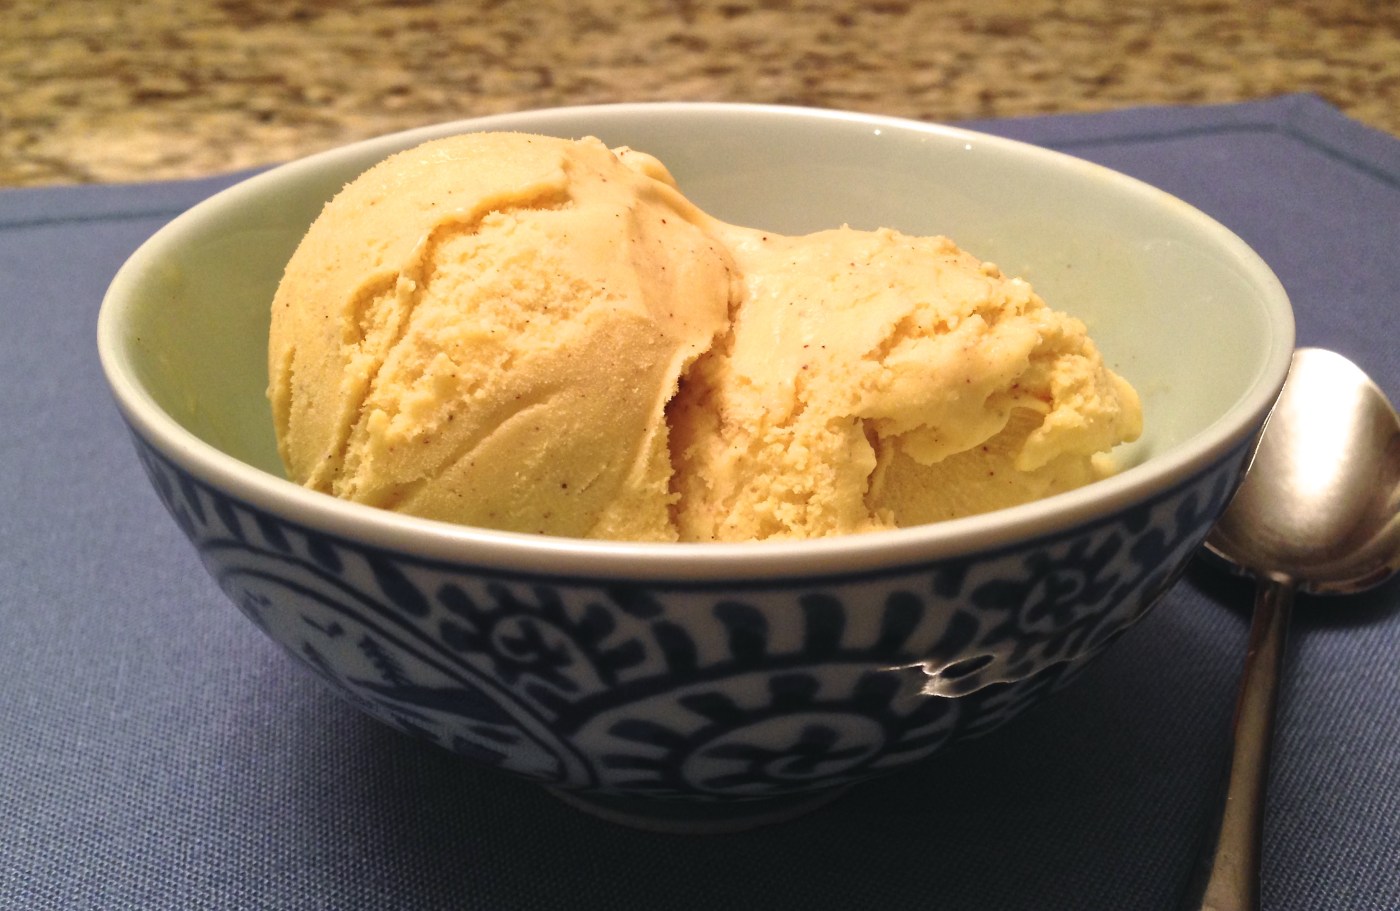
In this recipe, I used raw honey, grass-fed dairy products, and quality cinnamon to infuse the custard with lots of warm, rich flavors.

Honey-Cinnamon Ice Cream

(from Epicurious.com)

  • 2 cups milk
  • 2 cups heavy cream
  • 1 cinnamon stick, 2 inches long
  • 8 egg yolks
  • ¾ cup honey
  • 2 tablespoons sugar
  • ½ teaspoon ground cinnamon
  • ¼ teaspoon kosher salt
The custard needs to be strained before churning.

The custard needs to be strained before churning.

Combine the milk and cream in a saucepan. Break up the cinnamon stick into several small pieces, and add it to the pan. Over medium-high heat, scald the milk mixture (bubbles will form around the edge of the mixture, but you don’t want it to boil). Remove the pan from the heat and allow the cinnamon to steep in the dairy mixture for about an hour.

Meanwhile, in a bowl, whisk the egg yolks until well blended, then whisk in the honey, sugar, and ground cinnamon. After these ingredients are combined, return the milk mixture to the stove. Over medium-high heat, scald it again.

Slowly add the hot milk mixture to the egg mixture small amounts at a time, while whisking constantly. Once both of these mixtures have been incorporated, return the entire mixture to the saucepan over medium heat once more. Cook for approximately 6 to 8 minutes while stirring constantly with a wooden spoon. At first, it will seem thin, but then it will steam and immediately thicken. When it coats the back of the spoon, it is done. Remove the pan from the heat and strain through a fine mesh sieve into an airtight container. Mix in the salt, then cover and refrigerate for at least 2 hours, or until it is cold.

Churn the cold mixture in an ice cream maker according to the appliance’s directions. Once it is finished churning, place the ice cream in the freezer for at least two hours so that it can ripen and the flavors can develop further.

Sources:
  1. Theobald, Mary. (Spring 2010). Some Cold, Hard Historical Facts about Good Old Ice Cream. Colonial Williamsburg Journal. Retrieved from http://www.history.org/foundation/journal/spring10/icecream.cfm
  2. Avey, Tori. (2012, July 10). Explore the Delicious History of Ice Cream. The History Kitchen. Retrieved from http://www.pbs.org/food/the-history-kitchen/explore-the-delicious-history-of-ice-cream/
  3. Endothermic Ice Cream (2009, September 23). Cenco Physics (Weblog). Retrieved from http://blog.cencophysics.com/2009/09/endothermic-ice-cream/
  4. Olver, Lynne. (2004). Food Timeline FAQs: ice cream and ice. The Food Timeline. Retrieved from http://www.foodtimeline.org/foodicecream.html

Scones

Proper baking is a form of cookery that requires some serious commitment and practice. Until this past year, if I needed to procure some muffins, cookies, or a birthday cake, I usually just bought some premade dough or a box mix from the grocery store. To my surprise, I have actually grown to enjoy baking’s finicky nature. It contrasts nicely with my ‘anything goes’ attitude with other types of cooking in general.

Rather than getting in over my head trying to perfect complex pastries or cakes, I decided to try baking something new this week: scones. I found an excellent resource from Southern Living that provided a consistent scone base to which a number of different sweet and savory adaptations can be made.

I have to admit that, as a novice, preparing the dough for baking was a bit unnerving. I soon as I had pulled out all of my ingredients and preheated the over, I realized that I had overlooked the need for a pastry blender in the recipe. I frantically called my mom asking for alternatives.

I used two forks instead of a pastry blender to cut in the butter.

I used two forks instead of a pastry blender to cut in the butter.

Although I had seen my mom’s pastry blender collecting dust in one of her kitchen drawers, I had never actually known what this goofy-looking utensil was called. The name seems a bit over-hyped, but maybe I am a product of my generation—immediately assuming that a blender of any kind involves super efficient electric-powered blades. I feel like the only place I’ve seen a pastry blender in action before was at summer camp in the pottery studio. But I digress…

The purpose of a pastry blender is to cut cold fat (in this case, butter) into the dough in order to form layers that turn flaky during baking. This “cut in” or “shortening method” of making dough is actually very important to the consistency of your final baked product, but it turns out that using two forks works just as well as a fancy pastry-blending contraption. According to Sara Phillips at Craftybaking.com:

To “cut in” in serves the function of distributing the fat particles into the dry ingredients, typically flour, and coating and lubricating flour granules. This method greatly reduces the ability of the gluten proteins [gliadin and glutenin] in the flour to create gluten when mixed later with a liquid, such as water or milk.1,2

Pretty neat, huh? Unless you anticipate making a lot of scones, biscuits, piecrusts, etc., then I don’t suggest running out to purchase yet another piece of kitchen equipment. (If you’re anything like me, it’s getting more and more difficult to find places to store everything!)

My first batch of apricot-ginger scones prior to going into the oven.

My first batch of apricot-ginger scones prior to going into the oven.

Another brief warning to you fellow scone novices as well: if your dough is crumbly, difficult to form and/or refuses to be neatly cut into wedges, do not fear! I nearly had a heart attack when making my first batch. They refused to stay in the prescribed triangular shape, and I was afraid that this week’s post would be a complete failure. My advice? Just try your best to shape them (without over-working the dough) and I promise they will turn out delicious and rustic-looking. My co-workers devoured all of the blog goodies I brought in again this week… And they even offered to provide testimonials!

Now that you’ve gotten your daily dose of food science and your baking pep-talk, here’s some background on scones:

Authenticity is a major issue that plagues these flaky treats. Even the pronunciation of “scone” is highly debated—usually between Brits and Americans (skahn vs. skohn). Regardless of how you pronounce it, your scone recipe is probably guaranteed to anger someone on either side of the pond.

The original scones are said to have developed in Scotland as rounds of oat and barley dough that were cooked atop hot griddles, and then cut into wedges.3 Much like today, these quick breads were cheap to make and contained ingredients that were usually on hand or easily accessible. As Julia Moskin states:

They were a simple combination of fat, flour and liquid, which became softer and lighter as wheat, butter and leaveners like baking soda and baking powder became widely available.3

Eventually, British scones were brought to the United States, where they underwent further transformation. With the addition and substitution of a few ingredients, decadent Southern biscuits were born. Chef Andre Geary states that there are a few main differences between British and Americanized scones: butter, sugar, and add-ins. Rather than upping the butter and sugar content in the dough, Brits prefer to eat their freshly baked scones with butter, jams, or clotted cream alongside their afternoon tea.4 As far as add-ins go, the Brits prefer to keep things simple there as well. Chef Geary mentions a few traditional lackluster options such as currants or raisins, but it’s Americans who tend to push the envelope with chocolate, nuts, and other treats mixed into their scones.

My wedges started coming together much easier on the last batch.

My wedges started coming together much easier on the last batch.

Below I have provided the basic scone recipe that I used for this week’s post and the two flavorful adaptations I tried: apricot-ginger and asiago-rosemary.

Best-Ever Scones

(From Southern Living)

  • 2 cups all-purpose flour
  • 1/3 cup sugar
  • 1 tablespoon baking powder
  • ½ teaspoon salt
  • ½ cup cold butter, cut into half-inch cubes
  • 1 cup whipping cream, divided
  • Wax paper

Preheat the oven to 450°. Mix the first four ingredients in a large bowl. Cut the butter into the flour mixture with a pastry blender (or two forks) until crumbly. Freeze for 5 minutes.

Add ¾ cup plus 2 Tbsp. cream, and stir just until the dry ingredients are moistened through.

The asiago- rosemary scone dough.

The asiago- rosemary scone dough.

Turn the dough out onto wax paper and gently press or pat it into a 7-inch round (mixture will be crumbly). Cut the round into eight equal wedges. Place the wedges 2 inches apart on a lightly greased baking sheet. Brush the tops with the remaining 2 Tbsp. cream just until moistened.

Bake at 450° for 13 to 15 minutes or until golden.

Variations

Sweet Apricot-ginger Scones:

Apricot-ginger scones after baking.

Apricot-ginger scones after baking.

Stir in ½ cup finely chopped dried apricots and 2 Tbsp. finely chopped crystallized ginger with the cream. (Don’t be afraid to add a little bit of extra apricot or ginger. The flavor is wonderful!)

Savory Rosemary, Pear, and Asiago Scones:

Omit sugar. Stir in ¾ cup finely chopped fresh pear, ½ cup grated Asiago cheese, and 1 tsp. chopped fresh rosemary with the cream. (I omitted the pear in this recipe, added a bit of extra grated cheese and chopped rosemary to the dough, and then sprinkled even more asiago on top to make a nice crust.)

So how do you like your scones? Lots of add-ins? Served with jam and butter?

 Sources
  1. Phillips, S. (2000). Mixing Method – Cut In or Cutting In. Crafty Baking. Retrieved from https://www.craftybaking.com/howto/mixing-method-cut-or-cutting
  2. Castro, J. (2013, September 17). What is Gluten? Live Science. Retrieved from http://www.livescience.com/39726-what-is-gluten.html
  3. Moskin, J. (2014, February 25). Biscuits and Scones Share Tender Secrets. The New York Times. Retrieved from http://www.nytimes.com/2014/02/26/dining/biscuits-and-scones-share-tender-secrets.html?_r=0
  4. The Difference Between British and American Scones: Test Cook Andrea Geary Explains. (2015) Cook’s Illustrated. Retrieved from http://www.cooksillustrated.com/features/8521-the-difference-between-british-and-american-scones-test-cook-andrea-geary-explains

Jambalaya

This week I had some trouble deciding what to cook for the blog. I wanted to try something other than traditional French cuisine, but couldn’t settle on another culture or region, or even on one kind of protein. That was when jambalaya popped into my head. It’s spicy, hearty comfort food that can be made with a mish-mash of your favorite meat and seafood. Best of all, it’s cost-effective and can easily feed a crowd (not that I really have a crowd to feed).

While I was wandering through Whole Foods on Sunday night to purchase everything I needed, it occurred to me that my recipe only called for 4 ounces of chicken, 5 ounces of Andouille sausage, and 12 shrimp. Way to get specific, Emeril!

Initially, I had gone straight to the prepackaged meats section, where I realized that I’d end up buying way too much meat for this recipe. I ended up checking out the butcher counter instead, where I easily purchased one large chicken breast and two links of Andouille. I ended up saving myself a nice chunk of change.

This tip may seem like a no-brainer for some, but we are so conditioned to gathering pre-packed food at the supermarket, that unless we need something special-ordered or can’t readily find what we need, we don’t even speak to the butcher. It used to be that having a good relationship with your butcher or fishmonger was the only way to get the best cuts of meat or the freshest seafood.

As a young lady living alone, I am constantly trying to find ways to make appropriate portion sizes, cut down on my grocery bill, and minimize food waste. Usually, I’m pretty uncomfortable when speaking with the butcher (or buying any unfamiliar cuts of meat) because I find the terminology super confusing. I’m happy that I finally moved out of my comfort zone, and maybe now I’ll learn something new!

That’s enough on my butcher counter epiphany. Here’s your run-down on the history of jambalaya:

The 'Holy Trinity' of bell pepper, onion, and celery.

The ‘Holy Trinity’ of bell pepper, onion, and celery.

As with many dishes, the precise origins of jambalaya are unclear. Over the centuries, countless cultures ebb and flow, mixing together around the world. Places like Louisiana develop into vibrant melting pots, producing remarkable cuisines that can’t easily be tracked back to a single source. Plausible theories abound, and legends and folklore end up becoming “fact.”

One of the most popular explanations for the origin of jambalaya cites jambon, the French word for ham, and yaya, a supposed African term for rice. Although this is a creative theory suggesting it began as a ham and rice dish, many experts have discounted it. Comparisons of jambalaya to Spanish paella, West African jollof rice, and the French-Provencal “jambalaia,” or fowl, vegetable, and rice stew, confuse things even further.1, 2

A few years ago, culinary historian Andrew Sigal conducted a fascinating and extensive study into the origins of both the word jambalaya and the culinary dish. After a great deal of research, a decisive answer still was not reached, but Sigal leaned toward a Provencal origin for the word and a collective cultural origin for the dish. As he puts it:

The recipe might have been created or named in Europe, Africa, or America, and the creators might have been French, Occitan, Spanish, Acadian, Native American or African.3

The 'Holy Trinity,' vegetables, and rice just before the chicken broth is added.

The ‘Holy Trinity,’ tomatoes, and rice just before the chicken broth is added.

Regardless of its ambiguous geographical, cultural, and linguistic origins, pinning down an “authentic” recipe for jambalaya can be equally as frustrating. Enthusiasts disagree over whether tomatoes should be included, what kind of rice to use, how much of the holy trinity should be added, and which proteins belong in this dish.

Ultimately, the argument over certain ingredients and cooking methods has boiled down (no pun intended) to two separate camps: red and brown. The “city” or New Orleans version of jambalaya is usually red, due to the addition of tomatoes—a hallmark of Creole cuisine. On the other hand, the brown version is more prevalent in rural areas of Louisiana since it is typically cooked in a cast-iron pot, which lends itself to more thorough caramelization of the ingredients. This produces the brown color that is then absorbed by the rice.1

The meat and/or seafood isn't until the rice is nearly done cooking.

The meat and/or seafood isn’t added until the rice is nearly done cooking.

I have adapted the following recipe from renowned chef Emeril Lagasse, but make no claims about its authenticity! I left the tails on the shrimp for a bit more flavor, added an extra dash of Lagasse’s signature spice blend, and, as usual, doubled the veggie content. I hope you like your jambalaya hot!

Cajun Jambalaya

(Adapted from Chef Emeril Lagasse’s Jambalaya episode of The Essence of Emeril)

  • 12 medium shrimp, peeled and deveined with tails attached
  • 4 ounces chicken, diced
  • 1 ½ tablespoons Creole seasoning, recipe follows
  • 2 tablespoons olive oil
  • 1 cup chopped onion
  • 1 cup chopped green bell pepper
  • 1 cup chopped celery
  • 2 tablespoons chopped garlic
  • 1 cup chopped tomatoes
  • 3 bay leaves
  • 1 teaspoon Worcestershire sauce
  • 1 teaspoon hot sauce
  • 3/4 cup long-grain rice
  • 3 cups chicken stock
  • 5 ounces Andouille sausage, sliced
  • Salt and pepper

Combine the shrimp, chicken, and Andouille sausage in a bowl with the Creole seasoning, and mix by hand until the meat is thoroughly coated.

Heat the oil in a large pan over medium-high heat and sauté the onion, pepper, and celery for about 3 minutes. Next, add the garlic, tomatoes, bay leaves, hot sauce, and Worcestershire sauce. Stir in the rice, and then slowly add the broth.

Reduce the heat to medium, and cook for approximately 15 minutes, or until the rice becomes tender, but is not yet fully cooked. At this time, add the shrimp, chicken, and sausage, stirring well, and cook for another 10 minutes, or until the meat is cooked through.

The finished product!

The finished product!

In the recipe above, I suppose you could use your favorite creole seasoning mix. However, this was a great blend, and I can’t wait to use the leftovers for other recipes! (FYI, this makes a whopping 2/3 of a cup of seasoning)

Emeril’s ESSENCE Creole Seasoning (also referred to as Bayou Blast):

  • 2 ½ tablespoons paprika
  • 2 tablespoons salt
  • 2 tablespoons garlic powder
  • 1 tablespoon black pepper
  • 1 tablespoon onion powder
  • 1 tablespoon cayenne pepper
  • 1 tablespoon dried oregano
  • 1 tablespoon dried thyme
Sources:
  1. Bienvenu, M. (2011, September 15). Jambalaya shows both sides of Creole and Cajun influences. The Times-Picayune. Retrieved from http://www.nola.com/food/index.ssf/2011/09/jambalaya_shows_both_sides_of.html
  2. Dry, S. (2009, January/February). Jambalaya. Louisiana Life. Retrieved from http://www.myneworleans.com/Louisiana-Life/Winter-2008/Jambalaya/
  3. Sigal, A. (2007). Jambalaya by any other name. Petits Propos Culinaires, (84), 101-119. Retrieved from http://www.sigal.org/culinaryhistory/jambalaya/Jambalaya_by_Any_Other_Name.htm

Savory Breakfast Strata

If you’ve never heard of strata, you’ve seriously been missing out. It is one of the most simple, delicious, versatile, and affordable options for breakfast, brunch, or a potluck. Strata is basically a fancy name for a savory bread pudding so named for its alternating layers (strata) of bread, custard, cheese, and various other toppings. The following recipe is one of my favorites, but strata can basically be made with any coordinating combinations of vegetables, cheeses, meats, and herbs that you prefer.

I assembled this one in a flash after dinner on Monday and put it in the fridge to soak overnight. Tuesday morning, I woke up a little earlier than usual to take it out, let it warm up on the counter, and then bake it in the oven before heading off to work. My coworkers loved it, and my boss even washed my casserole dish and wrote me a thank you note! I think I may have to make another very soon since it was such a hit. (Unfortunately/fortunately, it disappeared so quickly that I didn’t have time to take hardly any pictures!)

Now here’s your weekly dose of food history:

One of the earliest known strata recipes supposedly comes from a 1902 cookbook by Juniata L. Shepperd entitled Handbook of Household Science.1 Oddly enough, this cheese strata recipe does not include eggs, which are characteristic of most (if not all) contemporary versions. Nonetheless, I’m bound to fall in love with anything featuring copious amounts of cheese, so I suppose I can find it in my heart to forgive Ms. Shepperd for her omission.

As I mentioned above, strata is basically a variation on bread pudding, which has an interesting history. Like many popular dishes nowadays, bread pudding had humble origins. European lower classes in the 11th and 12th centuries repurposed stale bread into “poor man’s pudding” or bread pudding to make the most of their meager resources.2 Even in today’s recipes for bread pudding and strata, using stale bread is crucial so that it adequately soaks up the custard that is poured over it. Custard has a more complicated background, but many food historians are of the opinion that the custard we are familiar with today originated in the Middles Ages, typically as a filling for pies, tarts, and other pastries.3

Regardless of whether you’re making any version of sweet or savory strata or pudding, remember to let your imagination (and sometimes your pantry) guide you when it comes to choosing toppings. Anything goes!

IMG_4470Sausage, Fontina, and Bell Pepper Strata

(adapted from Bon Appétit, June 2009)

  • 6 large eggs
  • 2 ½ cups whole milk
  • 2 cups sliced green onions
  • ½ cup whipping cream
  • ½ cup finely grated Romano cheese
  • 2 Tbsp. chopped fresh oregano
  • ½ tsp. salt
  • 1 pound hot Italian sausages, casings removed
  • 1 large red bell pepper, halved, seeded, and chopped
  • 1 1-pound loaf rustic French bread, cut into ½-inch slices and allowed to sit out briefly
  • 2 ½ cups coarsely grated Fontina cheese (or even more, if you prefer things extra cheesy)

Butter the bottom and sides of a 13×9-inch baking dish. Whisk the first 7 ingredients* together in a large bowl, and season well with freshly ground pepper.

The assembled dish, prior to setting and baking.

The assembled dish, prior to setting and baking.

In a large nonstick skillet, sauté the sausage and bell peppers, making sure to break up the meat well. Once the sausage is cooked through and the peppers are brown in spots, remove from the heat.

In the prepared baking dish, arrange half of the bread slices in the bottom, and then pour half of the egg mixture over the top. Sprinkle with one cup of the Fontina, then add half of the sausage/pepper mixture. Repeat this layering process once more. Use the final ½ cup of grated Fontina to sprinkle over the very top.

Allow the ingredients to stand in the dish for at least 20 minutes, occasionally pushing on the bread to encourage it to submerge. (I recommend covering it with plastic wrap and placing it in the fridge overnight with a few small plates on top to aid the bread in soaking up the custard.)

When you are ready to bake the strata, preheat the oven to 350 degrees and bake until golden brown, approximately 1 hour. If you let the strata set in the fridge, you may want to remove it to the counter prior to baking in order to take the chill off the dish and reduce the baking time. If the top begins to brown too quickly, cover the dish with a GREASED sheet or two of aluminum foil so that the cheese doesn’t burn or stick to the covering.

* I have noticed that when I buy bigger loaves of bread, the designated amount of custard in this recipe (first 7 ingredients) may not be enough. If your strata seems dry after soaking briefly, just whisk together another couple of eggs and a few splashes of milk and cream and pour it over the top. It won’t hurt anything, and it’ll ensure that your strata will turn out moist and not so bready.

Sources
  1. Shepperd, J. L. (1902). Hanbook of Houshold Science. Retrieved from https://books.google.com/books?id=HTRDAAAAIAAJ&pg=PA241#v=onepage&q&f=false
  2. McFadden, J. (2008, January 23). Bread pudding originated in 11th century as frugal dish, but has become trendy dessert. The Daily Gazette. Retrieved from http://www.dailygazette.com/news/2008/jan/23/0123_pudding/?print
  3. Olver, L. (1999) The Food Timeline. Retrieved from http://www.foodtimeline.org/foodpuddings.html#bread

Artichokes 101

Get to the heart of the art of cooking and eating these odd vegetables.

One of the best parts of moving back home to Naples, Florida, is having some more sophisticated food choices at my fingertips. I have already publicly confessed my love of chicken wings two weeks ago in The Dish, but I am really excited to have access to restaurants that serve something other than college town pub food or discount sushi (something that really shouldn’t exist). Now all I need is a spare moment away from work, cooking, and blogging to grab a friend and chow down!

Bricktop’s, a favorite lunch spot of mine here in town, happens to serve grilled artichokes with aioli dipping sauce as an appetizer. Even after ordering this dish countless times, I still can’t believe how something so simple can be so delicious. Frozen artichoke hearts are a staple in my kitchen, but I had never actually prepared fresh, whole artichokes before. So, this week I decided to try something new! (Also, truth be told, my bank account took a bit of a hit after last week’s decadent osso buco post, so I was looking for something a little easier on my wallet and my waistline.)

Sadly, as a young adult still stuck in the apartment stage of life, I’m not currently able to own a grill. In lieu of grilled ‘chokes, I decided to try both steaming and roasting them. After a bit of research, it was very clear to me that most people are seriously intimidated by these prehistoric-looking flower buds. The truth of the matter is that they couldn’t be easier to prepare.

IMG_4394Here’s a bit of background info on artichokes:

Although they are available pretty much year-round, the peak season for artichokes is spring. Nevertheless, I’m afraid I may have bought the very last of this season’s crop at Whole Foods earlier this week. All of the photos accompanying artichoke recipes online show crisp, vibrant green buds, but the ones I brought home—the only four left in the entire store—had very little in common with their more glamorous counterparts. They were still very tasty, regardless! A friend of mine opted to be my guinea pig this week, and I think we both decided that the steamed version was our favorite.

As I mentioned, artichokes are actually immature flowers of a species of thistle plant. The rigid ‘petals’ surrounding the artichoke are actually called bracts, and they help protect the flower inside from harsh weather and pests (like hungry, aioli-wielding humans).1 At the base of each bract is a bit of edible flesh, and deeper within the artichoke are the renowned heart and choke.

Be careful not to confuse the two! The heart is very tender and flavorful, while the choke is fibrous and will leave you feeling like you tried to swallow a handful of sawdust if you accidentally eat it. After peeling away (and savoring) all of the heartier bracts, you will be left with a stem and/or base with some softer, smaller petals. Upon removing these, you will see the fuzzy choke. Remove all of these fibers, and underneath you will find the prized heart!

Artichokes are suspected to have originated in the Mediterranean, although they quickly became popular and spread throughout the world over the centuries.2 Interestingly enough, nearly 100% of all commercially produced artichokes in the United States are grown in California.3 Scientists believe that the contemporary globe variety of artichoke actually descended from wild cardoons, which are also a part of the thistle family, but spikier and altogether more bizarre looking.2

However, the ancient Greek origin story surrounding the beloved artichoke is a bit more dramatic. It is said that the god Zeus fell madly in love with a mortal woman named Cynara, seduced her, made her a goddess, and brought her back to Mount Olympus to live with him. (Doesn’t sound too shabby, eh?) But poor Cynara became lonely and began secretly returning home to visit her family. Of course, the almighty Zeus eventually caught her sneaking around. This angered him so much that he banished her from Olympus and turned her into an artichoke.2 Leave it to the ancient Greeks to think up a scandalous and soap-opera-worthy origin story for an edible thistle bud…

:O artichoke style

:O artichoke style

Now that you’ve got a bit of background on this mysterious vegetable, here’s some practical information as well:

Basic Artichoke Prep

Before you start tackling any kind of recipe using whole artichokes, it’s important to know how to clean and prepare them. These tend to brown quickly once you start working with them, so try not to start your prep until you’re ready to pop them into the oven, onto the grill, etc. If you’re worried about your artichokes browning, or trying to get your prep done ahead of time, have half a lemon on hand to rub along the freshly trimmed areas in order to prevent oxidation. Here’s the skinny on ‘chokes:

  1. Like any kind of produce, rinse your artichokes well with cold water.
  2. Remove any small straggler leaves or unsightly dangly bits along the base of the bud and the stem.
  3. Cut about an inch off the top of the bulb.
  4. If you wish to keep the entire artichoke intact, trim a quarter inch off the stem and use a vegetable peeler to remove the fibrous outer layer. Otherwise, remove the entire stem.
  5. If your artichoke has small barbs at the end of each petal, use a pair of kitchen shears to snip off these sharp points.

Your are now ready to become an artichoke master!

Steamed Artichokes

(Adapted from ‘How to Cook and Eat an Artichoke’ by Elise Bauer on Simply Recipes)

  • 4 artichokes, washed and prepared as stated above
  • 3 garlic cloves, peeled and crushed
  • 1 bay leaf
  • 1 lemon, halved, plus juice
  • A few tablespoons of olive oil
  • Salt to taste
  • Black peppercorns (optional)
Artichokes near the end of the steaming process.

Artichokes near the end of the steaming process.

In a large pot, add a couple inches of water, the garlic, a few pinches of salt, the bay leaf, oil, and peppercorns, if using. Squeeze the juice of one lemon into the pot, and add the juiced halves as well. Bring this mixture to a boil.

Once boiling, insert a steamer basket into the pot and place the artichokes on top. If you are not using a basket, simply place the artichokes stem end up in the pot. Cover and reduce heat to a simmer.

Allow the artichokes to steam for 25 to 45 minutes depending on their size. When done, the outer leaves at the base of the stem can be removed easily.

Simply Roasted Artichokes

(From Chef John on AllRecipes.com)

  • 4 artichokes, washed and prepared as stated above
  • 4 garlic cloves, peeled and crushed
  • ¼ cup lemon juice
  • ¼ good olive oil
  • Kosher salt

Preheat the oven to 425 degrees.

In a bowl, gently spread the petals of each artichoke apart and drizzle the olive oil and lemon juice over the tops of the buds.

Insert a paring knife into the middle of each artichoke in order to create a small space. Insert a garlic clove into each cavity, and then season to taste with salt.

Roasted artichokes make me smile!

Roasted artichokes make me smile!

Wrap each artichoke tightly with a piece of parchment paper, and then again with a piece of foil (or two). Place the artichokes on a sheet pan and bake for approximately 1 hour and 20 minutes.

I recommend serving the cooked ‘chokes warm with aioli or your favorite dipping sauce. What is your favorite way to cook and eat artichokes?

Sources
  1. Harrison, M. (2011, March 9). Bracts: Leaves, Petals, or Something Else? Dave’s Garden. Retrieved from http://davesgarden.com/guides/articles/view/3156
  2. Rupp, R. (2014, November 12). The History of Artichokes. National Geographic. Retrieved from http://theplate.nationalgeographic.com/2014/11/12/artichokes/
  3. California Artichoke Advisory Board. (2015). Retrieved from http://artichokes.org/

Osso Buco

This slow-braised meal is a new favorite of mine.

When I decided to feature osso buco on the blog this week, I had no idea what I’d gotten myself into. Tender medallions of veal slowly braised on the bone in a sauce of white wine, homemade stocks, aromatics, and fresh herbs—I’m about to abandon this post and run to the kitchen for seconds. However, if you are as eager to try your hand at this dish as I was, there are a few things I must mention first:

  • Veal shanks aren’t cheap.

Unfortunately, I knew that this specific cut of meat wasn’t going to be particularly affordable, but I was hell-bent on using veal. (Until I actually started speaking with butchers at grocery stores around town, which brings me to number two…)

  • Give yourself plenty of advance notice to hunt down or order some shanks.

I can’t speak for all grocery stores, but after visiting and phoning a number of markets around town, it became clear to me that most of them don’t stock shanks of any kind on a regular basis. Don’t get stuck planning osso buco as the highlight of a dinner party without already securing your shanks first, or you (and your guests) will be very disappointed. (Take it from me: It isn’t cute to start desperately begging butchers for “any kind of shank you’ve got in the walk-in.”)

  • There are alternatives to veal.

Just plain can’t locate some veal? Feeling guilty about consuming delicious baby cows? Want to avoid taking out a loan to buy such a glorious cut of meat? I totally understand. Fortunately, there are other options! Beef, lamb, and pork shanks can all be used, but remember that the flavor of your end result will be different from the traditional veal, and these cuts will vary in size as well, possibly warranting a bit more cooking time.

“I WILL FIND YOU, VEAL SHANKS.”

Those are the main lessons I learned in my first experience with veal shanks. Hopefully these tips save you the hassle of running from store to store interrogating butchers about shanks like you’re Liam Neeson searching for his daughter in Taken.

Now that you’ve been briefed on my veal woes, we can get to some of the more interesting history behind osso buco:

In Italian, osso bucco means “bone with a hole” and refers to the decadent, marrow-filled shin bone that is a defining characteristic of this dish.1 I had never tried roasted marrow until I cooked this recipe, and I must admit that I have been missing out. I have heard chef and Bizarre Foods host Andrew Zimmern refer to bone marrow as “meat butter” before, but I didn’t fully understand his description until now. The idea of eating marrow weirded me out a bit at first, but it is important to try new things and waste as little of the animals we eat as possible. I highly recommend you try it!

Osso buco is usually associated with Milanese cuisine. Traditionally, it is served with risotto alla Milanese, a golden rice dish seasoned with saffron.1 I chose to pair my braised shanks with a simple, buttery Parmesan polenta, which paired beautifully with the rich sauce.

Mmm browned goodness.

Mmm browned goodness.

The recipe begins with two important components of making a flavorful braise, stew, or pan sauce: a fond and mirepoix. First, the veal shanks are seasoned, floured, and browned in a single layer on all sides in order to caramelize the meat a bit and develop a flavorful fond, or the browned bits in the bottom of the pan. This will naturally deglaze when the wine and stock are added to the pan and will infuse your sauce with incredible flavor.2 After removing the browned shanks from the pan, we introduce an Italian soffritto or mirepoix, consisting of chopped onions, celery, and carrots sautéed in butter or oil. (Italian soffritto is not to be confused with the Spanish/Latin version of sofrito I used in the pork pernil post!) This very simple mixture is the base for countless dishes.

Mirepoix

Mirepoix

The principle cooking method in osso buco is braising, which has an interesting history behind it. The word braise comes from the French term for “glowing embers.” Meat and vegetables used to be cooked with a small amount of liquid in a large, heavy pot over hot coals.3 However, like on a stove, even cooking is more difficult to achieve when the heat source is only coming into contact with the ingredients on one side–the bottom. Therefore, coals were also placed in an indentation on the lid of these large vessels in order to create more even heat distribution.3 Today, we replicate this method by using braising pans or Dutch ovens that begin the cooking process atop the stove and then finish in the oven. A well-executed braise is rather simple and traps all the flavors and moisture in the ingredients, which is especially useful for transforming tough cuts of meat into fall-off-the-bone tender morsels.

Hungry yet? Let’s move on to the recipe!

Osso Buco

(adapted from Ina Garten’s Barefoot Contessa Foolproof: Recipes You Can Trust)

  • 3 ribs celery, medium-diced
  • 3 carrots, medium-diced
  • 1 leek, cleaned well and medium-diced
  • 1/2 large yellow onion, medium-diced
  • 7 cloves garlic, minced
  • 1/2 cup pancetta, medium-diced
  • Approximately 4 Tbsp. butter
  • 8 oz. mushrooms, sliced
  • 1 Tbsp. lemon zest (about one lemon)
  • 2 cups good chicken stock
  • 2 cups good beef stock
  • 1 cup dry white wine
  • 4 large veal shanks tied with twine (or substitute beef, pork, or lamb shanks)
  • 1 cup flour
  • Kosher salt and ground pepper
  • Fresh herbs for bouquet garni (I used about 5 sprigs fresh thyme, two sprigs fresh sage, two sprigs fresh rosemary, 4 sprigs fresh parsley, secured with twine)

    Bouquet garni

    Bouquet garni

  • Kitchen twine

Preheat the oven to 350 degrees.

Rinse the shanks and dry well with paper towels. If not already tied, use one or two pieces of twine (depending on the size of the shanks) around the circumference of each shank in order to keep the meat attached to the bone as they cook.

Combine flour with 1 Tbsp. of salt and 1 tsp. of pepper. Coat each shank in flour, making sure to knock off any excess. In a Dutch oven, render the fat from the pancetta until it is browned and just crisp. Remove the pancetta pieces with a slotted spoon and set aside. Add 2 Tbsp. of butter to the pancetta fat, and once heated, brown the veal shanks in one layer on all sides. Additional oil or butter may need to be added. (Be sure not to crowd the pan, or the meat will steam instead of brown.) Once browned all over, remove the shanks to a plate.

Wipe the excess oil from the pot with paper towels. Melt 2 more Tbsp. of butter, then add the celery, carrots, leek, onion, and mushrooms. Saute over medium heat until the vegetables are tender, about 10 minutes. Add the garlic and lemon zest and cook for 1 more minute.

Osso buco just before going into the oven.

Osso buco just before going into the oven.

Add the wine and chicken and beef stock, scraping the pan with a wooden spoon or spatula to loosen the browned bits at the bottom. Introduce the shanks pack to the pan, add the bouquet garni, reserved pancetta, and salt and pepper to taste.

Allow the liquid to warm through, but not quite simmer, then cover the pan tightly and place in the oven for approximately 2 hours, or until the shanks are very tender.

Taste for seasoning, carefully remove the twine, and serve the shanks hot with the sauce atop polenta, mashed potatoes, or risotto.

(And don’t forget to dig into the marrow!)

Hello, beautiful.

Hello, beautiful.

Sources
  1. Cloake, F. (2014, March 6). How to cook the perfect osso buco. The Guardian. Retrieved from http://www.theguardian.com/lifeandstyle/wordofmouth/2014/mar/06/how-to-cook-perfect-osso-buco
  2. Allen, C. (2008, April 22). Fond of Fond. Cooking for Engineers. Retrieved from http://www.cookingforengineers.com/article/244/Fond-of-Fond
  3. Brenner, L., & Deane, D. (2015). Braise of glory. Los Angeles Times. Retrieved from http://www.latimes.com/food/la-fo-braising-s-story.html#page=1

Cherry Clafoutis

This rustic French dish is an easy and elegant option for dessert, breakfast, or brunch.

This week has been an exciting and dizzying experience. Monday marked the beginning of my first full time job (hello, adulthood!), and I couldn’t be happier with my current situation right now. However, I have to admit that I have been scrambling to balance work and experimenting in the kitchen. When I found this recipe during my research, I thought it would be a perfect dish to add to my repertoire. Although it has a fancy-sounding French name (I mispronounced it horribly when trying to explain this week’s post to my mom and co-workers), the recipe is very simple—only a few steps!

As much as it pained me to come home from work earlier this week and start littering my kitchen with sugar, flour, and cherry juice (aka baking), it was well worth it. The result was a flavorful, mildly sweet custard full of ripe, warm cherries, and it totally hit the spot. Cherries are in season and at their sweetest during the next couple of weeks, so get them while you can!

I brought the leftovers in to work this morning, and by the end of the day, only one piece was left! I’d consider that a success, especially since this recipe was the first time I had ever used a cherry pitter, and I accidentally missed a few of the stones…

Cherry pitters are magical, but I learned the hard way that you still need to be extra thorough when removing the pits.

Cherry pitters are magical, but I learned the hard way that you still need to be extra thorough when removing the pits.

I’d like to think that they simply added some extra flavor to the dish since the original recipe calls for unpitted cherries. (At least that’s what I told my new guinea pigs/colleagues!)

Lastly, though clafoutis is considered a dessert, I think that this dish could easily be the star of a breakfast or brunch table as well. Not to mention it is easily adaptable for whatever fruit happens to be in season. So, read on to learn a bit more about this versatile dish, hit up the grocery store for some fresh fruit, and get your clafoutis on:

First of all, let’s start with the pronunciation. Here’s a quick recording of how to say the name of this dish without sounding completely silly like yours truly:

Clafoutis first originated in the Limousin region of France, where, due to the unique geography of the area, farming is particularly successful. Historically, the cuisine of this region is reliant upon local ingredients, making for simple, rustic dishes.1 The name clafoutis can supposedly be traced to the Occitan dialect word claufir, to cover or fill.2 Traditionally, a Limousin clafoutis is prepared with unpitted cherries, but when it uses other kinds of fruit instead, it is called a flaugnarde.

Cherries are a member of the genus Prunus, which belongs to the Rose family (Rosaceae).3 These small stone fruits are actually closely related to peaches, apricots, and even almonds. It is said that the original clafoutis recipe included the cherry pits in order to provide a subtle almond flavor to the dessert. Surprisingly enough, this distinct flavor comes from a natural poisonous compound that plants in the Prunus family produce in order to discourage herbivores from chowing down on them. This toxin, amygdalin, is a precursor to a chemical I’m sure you all have heard of: cyanide.3

Now, before you jump to the conclusion that I’m trying to poison you with a delicious French dessert, it’s important to know that cyanide gas is a miniscule byproduct of consuming ingredients like cherry pits that contain amygdalin. I would suggest eating around the pits if you choose to leave them whole in your clafoutis, but you certainly won’t experience any detrimental effects from accidentally swallowing or nibbling on a few of them. (The difficult part would be trying not to break a tooth!) Another less potent and more enjoyable byproduct of amygdalin is benzaldehyde, which is responsible for that lovely almond flavor.IMG_4263

(Later this week I plan to experiment with adding a dash of almond extract to the custard in order to more closely replicate the traditional recipe’s flavors. I’ll post an update with my conclusions!)

As for the unpitted vs. pitted decision, for me, it boiled down to when and how I wanted to work around the pits: either before baking with a cherry pitter or after baking with my teeth. Personally, I’d rather get them out of the way so I can enjoy my dessert without risking an emergency trip to the dentist. I’m also still contemplating what the proper etiquette for consuming an unpitted clafoutis would be… a clafoutis spittoon?

Cherry Clafoutis

(adapted from Saveur at http://www.saveur.com/article/Recipes/Cherry-Clafoutis)

  • 1 tablespoon unsalted butter, softened
  • 1 1/4 cups whole milk
  • 6 tablespoons sugar (adjustments may be necessary depending on the ripeness of your fruit)
  • 2 tablespoons kirschwasser
  • 1 1/2 tablespoons vanilla extract
  • 6 eggs
  • 1/2 teaspoon salt
  • 3/4 cup flour
  • 3 cups ripe cherries, pitted or unpitted (or other fruit of your choice)
  • Powdered sugar for dusting

Preheat the oven to 425 degrees. Thoroughly grease the bottom and sides of a 9″ cast-iron skillet or baking dish with butter. In a blender, combine the butter, milk, sugar, kirsch, vanilla, eggs, and salt to form the base of your custard. Blend these ingredients together, then incorporate the flour and process until smooth–about 1 minute.

Clafouti just prior to going into the oven.

Clafoutis just prior to going into the oven.

Pour the custard into the greased skillet, then evenly distribute the cherries atop the batter. Bake for approximately 30 minutes, or until a skewer inserted into the batter comes out clean and the top is golden.

Sprinkle with powdered sugar and serve with a dollop of whipped cream on the side.

  1. Limousin: the “château d’eau”. (n.d.). France.fr. Retrieved from http://www.france.fr/en/regions-and-cities/limousin-chateau-deau.html
  2. Cloake, F. (2013, August 29). How to cook the perfect cherry clafoutis. The Guardian. Retrieved from http://www.theguardian.com/lifeandstyle/wordofmouth/2013/aug/29/how-to-cook-perfect-cherry-clafoutis
  3. Preston, K. A. (2012, August 30). The Stone Fruits of Summer [Web log]. Retrieved from https://botanistinthekitchen.wordpress.com/2012/08/30/the-stone-fruits-of-summer/#more-65

Pork Pernil

Things are really coming together at my new place. Best of all, I finally have Internet! However, I spent most of my time with my mom at her place over the weekend. We had a blast cooking together for this week’s post, watching old movies, and enjoying a few mimosas during the process. I hope you all had a wonderful time with your mothers this weekend as well!

Now, I can’t speak for everyone out there, but pork is one of those culinary delicacies that I can never get enough of. Roasts, chops, sausages, tenderloins, bacon, prosciutto: you name it. Pork products are my tasty, tasty kryptonite. So, it seemed only proper to feature a glorious roasted pork recipe in one of my first posts.

Lilly and Dixie got to enjoy some of the pork bones after all our hard work was over!

Lilly and Dixie got to enjoy some of the pork bones after all our hard work was over!

Although this slow-cooked dish takes a number of hours to marinate and roast, the recipe is fairly simple. Personally, I love things that I can prep ahead of time and then just pop in the oven. I adapted this pernil recipe from Cook’s Country, and it turned out fabulous. This would also be ideal for a summer get-together since it is affordable and easily feeds a crowd. Although the crowd that enjoyed this roast consisted only of my mother, myself, and our two spoiled Maltese pups.

Here is a bit of background on Pork Pernil:

Pernil is traditionally cooked using a fresh ham from the rear of the pig. However, this recipe (and most out there, it seems) calls for a pork picnic shoulder. The meat is marinated for at least 12 hours, cooked low and slow initially, and then at a higher temperature to crisp the skin. The bones, connective tissue, skin, and fat in this cut will all contribute to intensifying the decadent pork flavor of the meat and pan drippings. Essentially, using smaller and easier-to-find cuts of the hog helps you to replicate a full-blown outdoor pig roast in your oven.

I love the bright color of the sofrito marinade!

I love the bright color of the sofrito marinade!

Particularly popular as a Christmas dish in Puerto Rico, pork pernil is seasoned with traditional spice blends such as adobo and/or sofrito and served with rice and pigeon peas. Like any dish, preferred seasonings can vary widely from country to country, region to region, and family to family. Adobo is the Spanish term for a marinade or dressing that is comprised of herbs and spices—usually with a base of garlic, oregano, and black pepper.1 Sofrito is another popular staple in Spanish, Latin American, and Portuguese cooking. The ingredients in this flavorful base are typically lard or oil, onions, various kinds of peppers, cilantro, and sometimes tomatoes.2 Combining these two seasonings for marinating and braising the pork really IMG_4026imparts a lot of rich flavor.

I’m already getting hungry for leftovers again, so let’s get to the recipe!

Pork Pernil

(adapted from Cook’s Country at https://www.cookscountry.com/recipes/7453-pork-pernil)

  • 2 cups chopped cilantro leaves and stems
  • 1 Spanish onion, chopped
  • ¼ cup salt
  • ¼ cup olive oil
  • 12 garlic cloves, peeled
  • 1 tablespoon dried oregano
  • 2 tablespoons pepper
  • 1 tablespoon cumin
  • 2 heaping tablespoons fresh thyme
  • ¼ cup fresh parsley
  • 1 cubanelle pepper, chopped with ribs and seeds removed
  • 1 jalapeno, chopped with ribs and seeds removed (optional)
  • 1 bone-in pork picnic shoulder with skin on
  • 1½ tablespoons lime zest
  • 2/3 cup of lime juice

To make your sofrito mixture, combine 1½ cups of cilantro, the onion, salt, olive oil, garlic, oregano, pepper, cumin, thyme, parsley, and cubanelle and jalapeno peppers in a food processor. Blend well until the sofrito is finely ground. Dry the pork shoulder with paper towels and then spread the sofrito over the entire roast. Marinate in the fridge overnight, or for at least 12 hours for best results.

This is just after removing the foil.

This is just after removing the foil.

Shortly before you are ready to begin cooking, remove the pork from the refrigerator just to take the chill off. Preheat the oven to 450 degrees and pour 8 cups of water into a large roasting pan. Place the roast skin side down in the pan and cover it tightly with aluminum foil. Roast for 90 minutes. I suggest placing the roast in the lower third of the oven to prevent it from being too close to the heating element–especially in later steps when crisping the skin.

Remove the foil and decrease the oven temperature to 375 degrees. Roast for 2½ hours.

Remove the pan from the oven and prepare your V-rack with nonstick cooking spray. Carefully remove the roast from the pan in one piece (the skin may try to stick to the bottom) and transfer it to the V-rack with the skin side up. Pat the skin dry with paper towels to allow it to begin crisping. Place the V-rack inside the roasting pan with the juices and return to the oven for 1 hour. If the juices in the pan begin to run low, add water as needed.

Look at that crispy skin!

Look at that crispy skin!

Line a large, rimmed baking sheet with foil. Remove the pan from the oven and transfer the pork and the V-rack to the baking sheet. Return the pork to the oven and increase the temperature to 450 degrees. Roast for 15-30 minutes, rotating the sheet halfway through. When it is done, the skin should turn dark brown and make a hollow, crispy noise when tapped with a utensil.

Remove to a carving board and let the pork rest for 30-45 minutes. While the roast is resting, take the juices from the roasting pan and pour them into a fat separator. Let the juices settle for a few minutes and then pour the defatted liquid into a large bowl.

I could drink these juices with a straw.

I could drink these juices with a straw.

Add the remaining ½ cup of cilantro (leaves look prettiest added to the sauce) and the lime zest and juice.

Carefully remove the crispy skin from the pork in one piece, and scrape away any large globs of fat from the bottom of the skin. Chop the cracklin into bite-size pieces and set aside on a plate. (Do not let them steam in a bowl or they will get soggy!) Remove the meat from the bone, taking care to discard any excess fat. Chop roughly and add to just enough of the cilantro-lime pan juices to moisten and flavor the meat (about 1 cup). Toss and serve with the crunchy skin on the side. Garnish with wedges of lime.

The finished roast along with the cilantro-lime juices. (We over-cooked the skin just slightly)

The finished roast along with the cilantro-lime juices. (We over-cooked the skin just slightly)

  1. Collado, K. (2014, December 30). What is Adobo. The Daily Meal. Retrieved from http://www.thedailymeal.com/cook/what-adobo
  2. Rodriguez, H. (2015). Sofrito. Retrieved from http://latinfood.about.com/od/seasoningmarinade/p/What-Is-Sofrito.htm

Ginger Breeze

Once again, summer is just around the corner. Around this time each year, as the temperatures hover in the upper 80s, I begin to regret cursing the mild and intermittent chills that we Floridians call ‘winter’. In no time at all, it will be impossible to set foot outside for even a moment without breaking into a violent sweat.

There's nothing like perfecting recipes mid-move!

There’s nothing like perfecting recipes mid-move!

Thankfully, I just completed my big move before the dog days of the season. However, it was still sweltering and unpleasant enough to prompt me to try out a new concoction meant to help ward off the oppressive summer heat. Allow me to introduce the ginger breeze. Once I’m all unpacked, I want to do nothing else but lay on the beach sipping one of these until I start my new job in two weeks.

This drink uses ginger-infused vodka and thyme simple syrup to spruce up a tried and true iced tea and lemonade beverage. Some of you may know the nonalcoholic version as an Arnold Palmer or half and half. As refreshing as the original is, however, I feel that a summery beverage definitely calls for an extra kick. Although it may sound fancy, it’s actually quite easy to make.

The original Arnold Palmer beverage is, of course, named after the renowned golfer. With 92 overall victories, 4 Masters, two PGA Player of the Year Awards, the Presidential Medal of Freedom, and many more accolades, Palmer’s legacy is far greater than a refreshing clubhouse mocktail.1 In that golf history vein, an alcoholic version of this citrusy tea drink may also be referred to as a John Daly. Another prominent golfer with a less pristine past, Daly has admitted to struggling with alcohol and gambling issues.2 The ginger breeze certainly is tasty, but hopefully it doesn’t cause anyone to start binge drinking or wearing obnoxiously loud golf pants.

I apologize for the shorter entry this week, but I am still mostly living out of boxes and without internet! If you try this recipe, I’m pretty sure you’ll forgive me:

Ginger Breeze

       Ginger-infused vodka

  • ½ cup fresh ginger root, chopped
  • 1.75 liter bottle of good vodka

       Thyme rich simple syrup

  • 2 cups granulated sugar
  • 1 cup water
  • 8 sprigs fresh thyme
  • 3 tea bags (black tea)
  • 3 cups water
  • 1 ½ cups fresh squeezed lemon juice

For the ginger-infused vodka, pour entire bottle into a pitcher with a lid. Add the chopped fresh ginger and store in a cool, dark place. Allow the mixture to infuse for at least three days, and stir or shake it a few times per day. Once the vodka is done, strain out the ginger pieces.

To make the rich simple syrup, combine two cups of sugar and one cup of water in a saucepan over medium heat. Stir until the sugar is completely dissolved and the mixture has thickened a bit. Remove from heat and add the sprigs of thyme. Let the syrup and herbs infuse for 10-15 minutes. Remove the thyme and store in a lidded container in the refrigerator.

Brew three cups of tea to your desired strength and let it cool. (I used Lipton original black tea*.) Combine the tea, lemon juice, 1½ cups of simple syrup, and two cups of vodka in a pitcher and serve chilled with a sprig of thyme or a slice of candied ginger.

*Note: I’m not really a tea person (aka a coffee addict) and actually over-steeped my tea and it was incredibly strong. To counteract the bitterness, I diluted my tea with water and used three cups of this mixture in the final recipe. Try not to steep your tea too long, but if you do, just try this simple fix.

Sources
  1. Arnold Palmer. (2015). Retrieved from http://www.arnoldpalmer.com/allarnie/index.aspx
  2. Murray, E. (2014, April 7). John Daly: I was young and dumb back in the 90s but I had a lot of fun. The Guardian. Retrieved from http://www.theguardian.com/sport/2014/apr/07/john-daly-masters-golf-young-dumb-90s

Chicken Paprikás

Take a trip to Hungary via your spice cabinet. Paprika is sure to warm your soul.

Florida’s rainy summer weather is starting already, and I have to say, I’m quite fond of the thunderstorms that roll in each afternoon like clockwork. (So long as I have nowhere to be and can cozy up in my apartment with a good book or movie!) The only thing that’s been missing from my rainy day festivities is some soul-warming comfort food.

hunky1

One of my great-grandmother’s cookbooks–published in 1955!

It just so happens that my mom dug up her grandmother’s (my great-grandma’s) old cookbooks the other day, so I thought I’d try to whip up one of these recipes with my own flair. My maternal grandfather’s family was extremely Hungarian, so most of the books and recipes that my mom rediscovered include things like ‘pot steak,’ jellied pigs’ feet, and stuffed cabbage. Considering that most people these days aren’t gnawing away on pickled pigs’ feet, I thought I’d go for a classic slow-cooked dish: chicken paprikás.

Looking over the few different recipes for chicken paprikás in my great grandmother’s cookbooks, I noticed that there was a serious lack of vegetables in all of them. But, to be fair, this dish originated as humble country grub. While the adapted recipe I’ve provided below may not be totally authentic, I found it to be flavorful and a tad more nutritious. (Veggies 4 lyfe!)

hung2

One of the variations I found in my great-grandma’s cookbooks.

Here’s a bit of background on this beloved Hungarian entrée:

Chicken paprikás is named for the spice that stars in this flavorful red dish. Paprika is made by grinding the pods of Capsicum annuum peppers into a powder. It can come in eight different grades, varying from mildly sweet and bright red (Különleges) to a dark reddish brown with ample heat (Erös). Paprika has become pretty much synonymous with Hungarian cooking, but the peppers from which it is made did not originate anywhere near Central Europe.

IMG_3924

My version of paprikás simmering away on the stove.

Native to North and northern South America, Capsicum annuum is a species of pepper that varies widely in shape, size, color, and level of spice.1 It is said that Christopher Columbus mistook these spicy plants for the source of prized black pepper and brought them back to Spain from the New World at the end of the 15th century.2, 3 However, culinary use of these peppers did not take off immediately. Paprika peppers, or ‘Turkish peppers’ were actually used as exotic ornamental plants in wealthy Europeans’ gardens.3

Like many ingredients in the culinary world, paprika did come full circle, though. In the 16th and 17th centuries, paprika was brought to Hungary from the Balkans by Greek, Turkish, and Slavic peoples.3 Peasants and herdsmen began using the spice in their simple stews, such as gulyás (goulash), and eventually wealthier folks embraced the practice as well. It is suggested that widespread use of paprika in Hungary came about in the late 18th century, when it appears on a written monastery inventory, and even as a surname in a few registry documents.3IMG_3901

Nowadays, paprika is typically used as a finishing touch of color atop deviled eggs, but if you’re looking for some truly authentic flavor in your paprikás or gulyás, look for the Hungarian variety. The two main hubs for paprika production in Hungary are Szeged and Kalocsa, and each is home to a paprika museum and festival. (Szeged brand is what I used in the recipe below, and it is available in many grocery stores.)

Chicken Paprikás

  • 2 Tbsp. bacon fat or oil
  • 1 medium onion, chopped
  • 1 red bell pepper, chopped
  • 8 oz. mushroom caps, sliced
  • 4 cloves garlic, crushed
  • 1.5 lbs. chicken pieces (I opted for skinless chicken thighs)
  • 1 cup chicken broth (approx.)
  • 2.5 Tbsp. sweet Hungarian paprika
  • 1 Tbsp. tomato paste
  • Salt and pepper to taste
  • 1 cup sour cream brought to room temperature
  • Cooked egg noodles for serving

Heat bacon fat or oil in a dutch oven over medium heat. Once hot, add onions and carefully brown, stirring frequently to avoid sticking and burning. After the onions are browned, salt and pepper the chicken pieces and add them to the pot. Brown chicken on both sides. Add the red pepper, garlic, and mushrooms, stirring to incorporate well. Allow to saute for a few minutes.

Carefully brown the onions and chicken.

Carefully brown the onions and chicken.

Add enough chicken broth to just cover the chicken pieces, being sure to scrape the flavorful browned bits from the bottom of the pot. Stir in the paprika and tomato paste, lower heat to a simmer, and cover. Let cook for approximately one hour.

The chicken should be tender and easily come off the bone, and the drippings should be of a sauce consistency once done. If there is too much liquid, cook a little longer uncovered to boil it off, or use a roux to thicken to desired consistency.

Remove the pot from the heat and allow it to cool for a few minutes. Take the room temperature sour cream and slowly stir in warm sauce from the pot a spoonful at a time. This ‘tempering’ helps to ensure that your sauce will incorporate smoothly rather than break or curdle. Once the sour cream is warmed, add it all to the pot and stir.

Voila: A hearty hunky favorite!

Voila: A hearty hunky favorite!

Serve hot over dumplings, rice, mashed potatoes, or noodles. Enjoy!

Sources:
1) Paprika. (2015). In Encyclopædia Britannica. Retrieved from
http://www.britannica.com/EBchecked/topic/442178/paprika
2) Swains, H. (2013). Paprika: A primer on Hungary’s spicy obsession. Retrieved
from http://www.cnn.com/2013/11/29/travel/paprika-hungary/
3) Smith, M., & Jusztin, M. (2014). Paprika: The spice of life in Hungary. In Jolliffe, L.
(Ed.), Spices and tourism: Destinations, attractions, and cuisines (pp. 53-71). Bristol, UK: Channel View.
Italian Home Kitchen Blog

Italian Home Kitchen Blog

Food Fellowship and Wine

A celebration of all things good

My Meals are on Wheels

Life and Cooking from a Wheelchair

Cooking Without Limits

Food Photography & Recipes

Round Two

"Life is better than we expected."

Cooking Up The Pantry

Feeding a hungry family!

Plant Based Protagonist

Protagonist: An advocate or champion for a particular cause or idea