Proper baking is a form of cookery that requires some serious commitment and practice. Until this past year, if I needed to procure some muffins, cookies, or a birthday cake, I usually just bought some premade dough or a box mix from the grocery store. To my surprise, I have actually grown to enjoy baking’s finicky nature. It contrasts nicely with my ‘anything goes’ attitude with other types of cooking in general.
Rather than getting in over my head trying to perfect complex pastries or cakes, I decided to try baking something new this week: scones. I found an excellent resource from Southern Living that provided a consistent scone base to which a number of different sweet and savory adaptations can be made.
I have to admit that, as a novice, preparing the dough for baking was a bit unnerving. I soon as I had pulled out all of my ingredients and preheated the over, I realized that I had overlooked the need for a pastry blender in the recipe. I frantically called my mom asking for alternatives.

I used two forks instead of a pastry blender to cut in the butter.
Although I had seen my mom’s pastry blender collecting dust in one of her kitchen drawers, I had never actually known what this goofy-looking utensil was called. The name seems a bit over-hyped, but maybe I am a product of my generation—immediately assuming that a blender of any kind involves super efficient electric-powered blades. I feel like the only place I’ve seen a pastry blender in action before was at summer camp in the pottery studio. But I digress…
The purpose of a pastry blender is to cut cold fat (in this case, butter) into the dough in order to form layers that turn flaky during baking. This “cut in” or “shortening method” of making dough is actually very important to the consistency of your final baked product, but it turns out that using two forks works just as well as a fancy pastry-blending contraption. According to Sara Phillips at Craftybaking.com:
To “cut in” in serves the function of distributing the fat particles into the dry ingredients, typically flour, and coating and lubricating flour granules. This method greatly reduces the ability of the gluten proteins [gliadin and glutenin] in the flour to create gluten when mixed later with a liquid, such as water or milk.1,2
Pretty neat, huh? Unless you anticipate making a lot of scones, biscuits, piecrusts, etc., then I don’t suggest running out to purchase yet another piece of kitchen equipment. (If you’re anything like me, it’s getting more and more difficult to find places to store everything!)

My first batch of apricot-ginger scones prior to going into the oven.
Another brief warning to you fellow scone novices as well: if your dough is crumbly, difficult to form and/or refuses to be neatly cut into wedges, do not fear! I nearly had a heart attack when making my first batch. They refused to stay in the prescribed triangular shape, and I was afraid that this week’s post would be a complete failure. My advice? Just try your best to shape them (without over-working the dough) and I promise they will turn out delicious and rustic-looking. My co-workers devoured all of the blog goodies I brought in again this week… And they even offered to provide testimonials!
Now that you’ve gotten your daily dose of food science and your baking pep-talk, here’s some background on scones:
Authenticity is a major issue that plagues these flaky treats. Even the pronunciation of “scone” is highly debated—usually between Brits and Americans (skahn vs. skohn). Regardless of how you pronounce it, your scone recipe is probably guaranteed to anger someone on either side of the pond.
The original scones are said to have developed in Scotland as rounds of oat and barley dough that were cooked atop hot griddles, and then cut into wedges.3 Much like today, these quick breads were cheap to make and contained ingredients that were usually on hand or easily accessible. As Julia Moskin states:
They were a simple combination of fat, flour and liquid, which became softer and lighter as wheat, butter and leaveners like baking soda and baking powder became widely available.3
Eventually, British scones were brought to the United States, where they underwent further transformation. With the addition and substitution of a few ingredients, decadent Southern biscuits were born. Chef Andre Geary states that there are a few main differences between British and Americanized scones: butter, sugar, and add-ins. Rather than upping the butter and sugar content in the dough, Brits prefer to eat their freshly baked scones with butter, jams, or clotted cream alongside their afternoon tea.4 As far as add-ins go, the Brits prefer to keep things simple there as well. Chef Geary mentions a few traditional lackluster options such as currants or raisins, but it’s Americans who tend to push the envelope with chocolate, nuts, and other treats mixed into their scones.
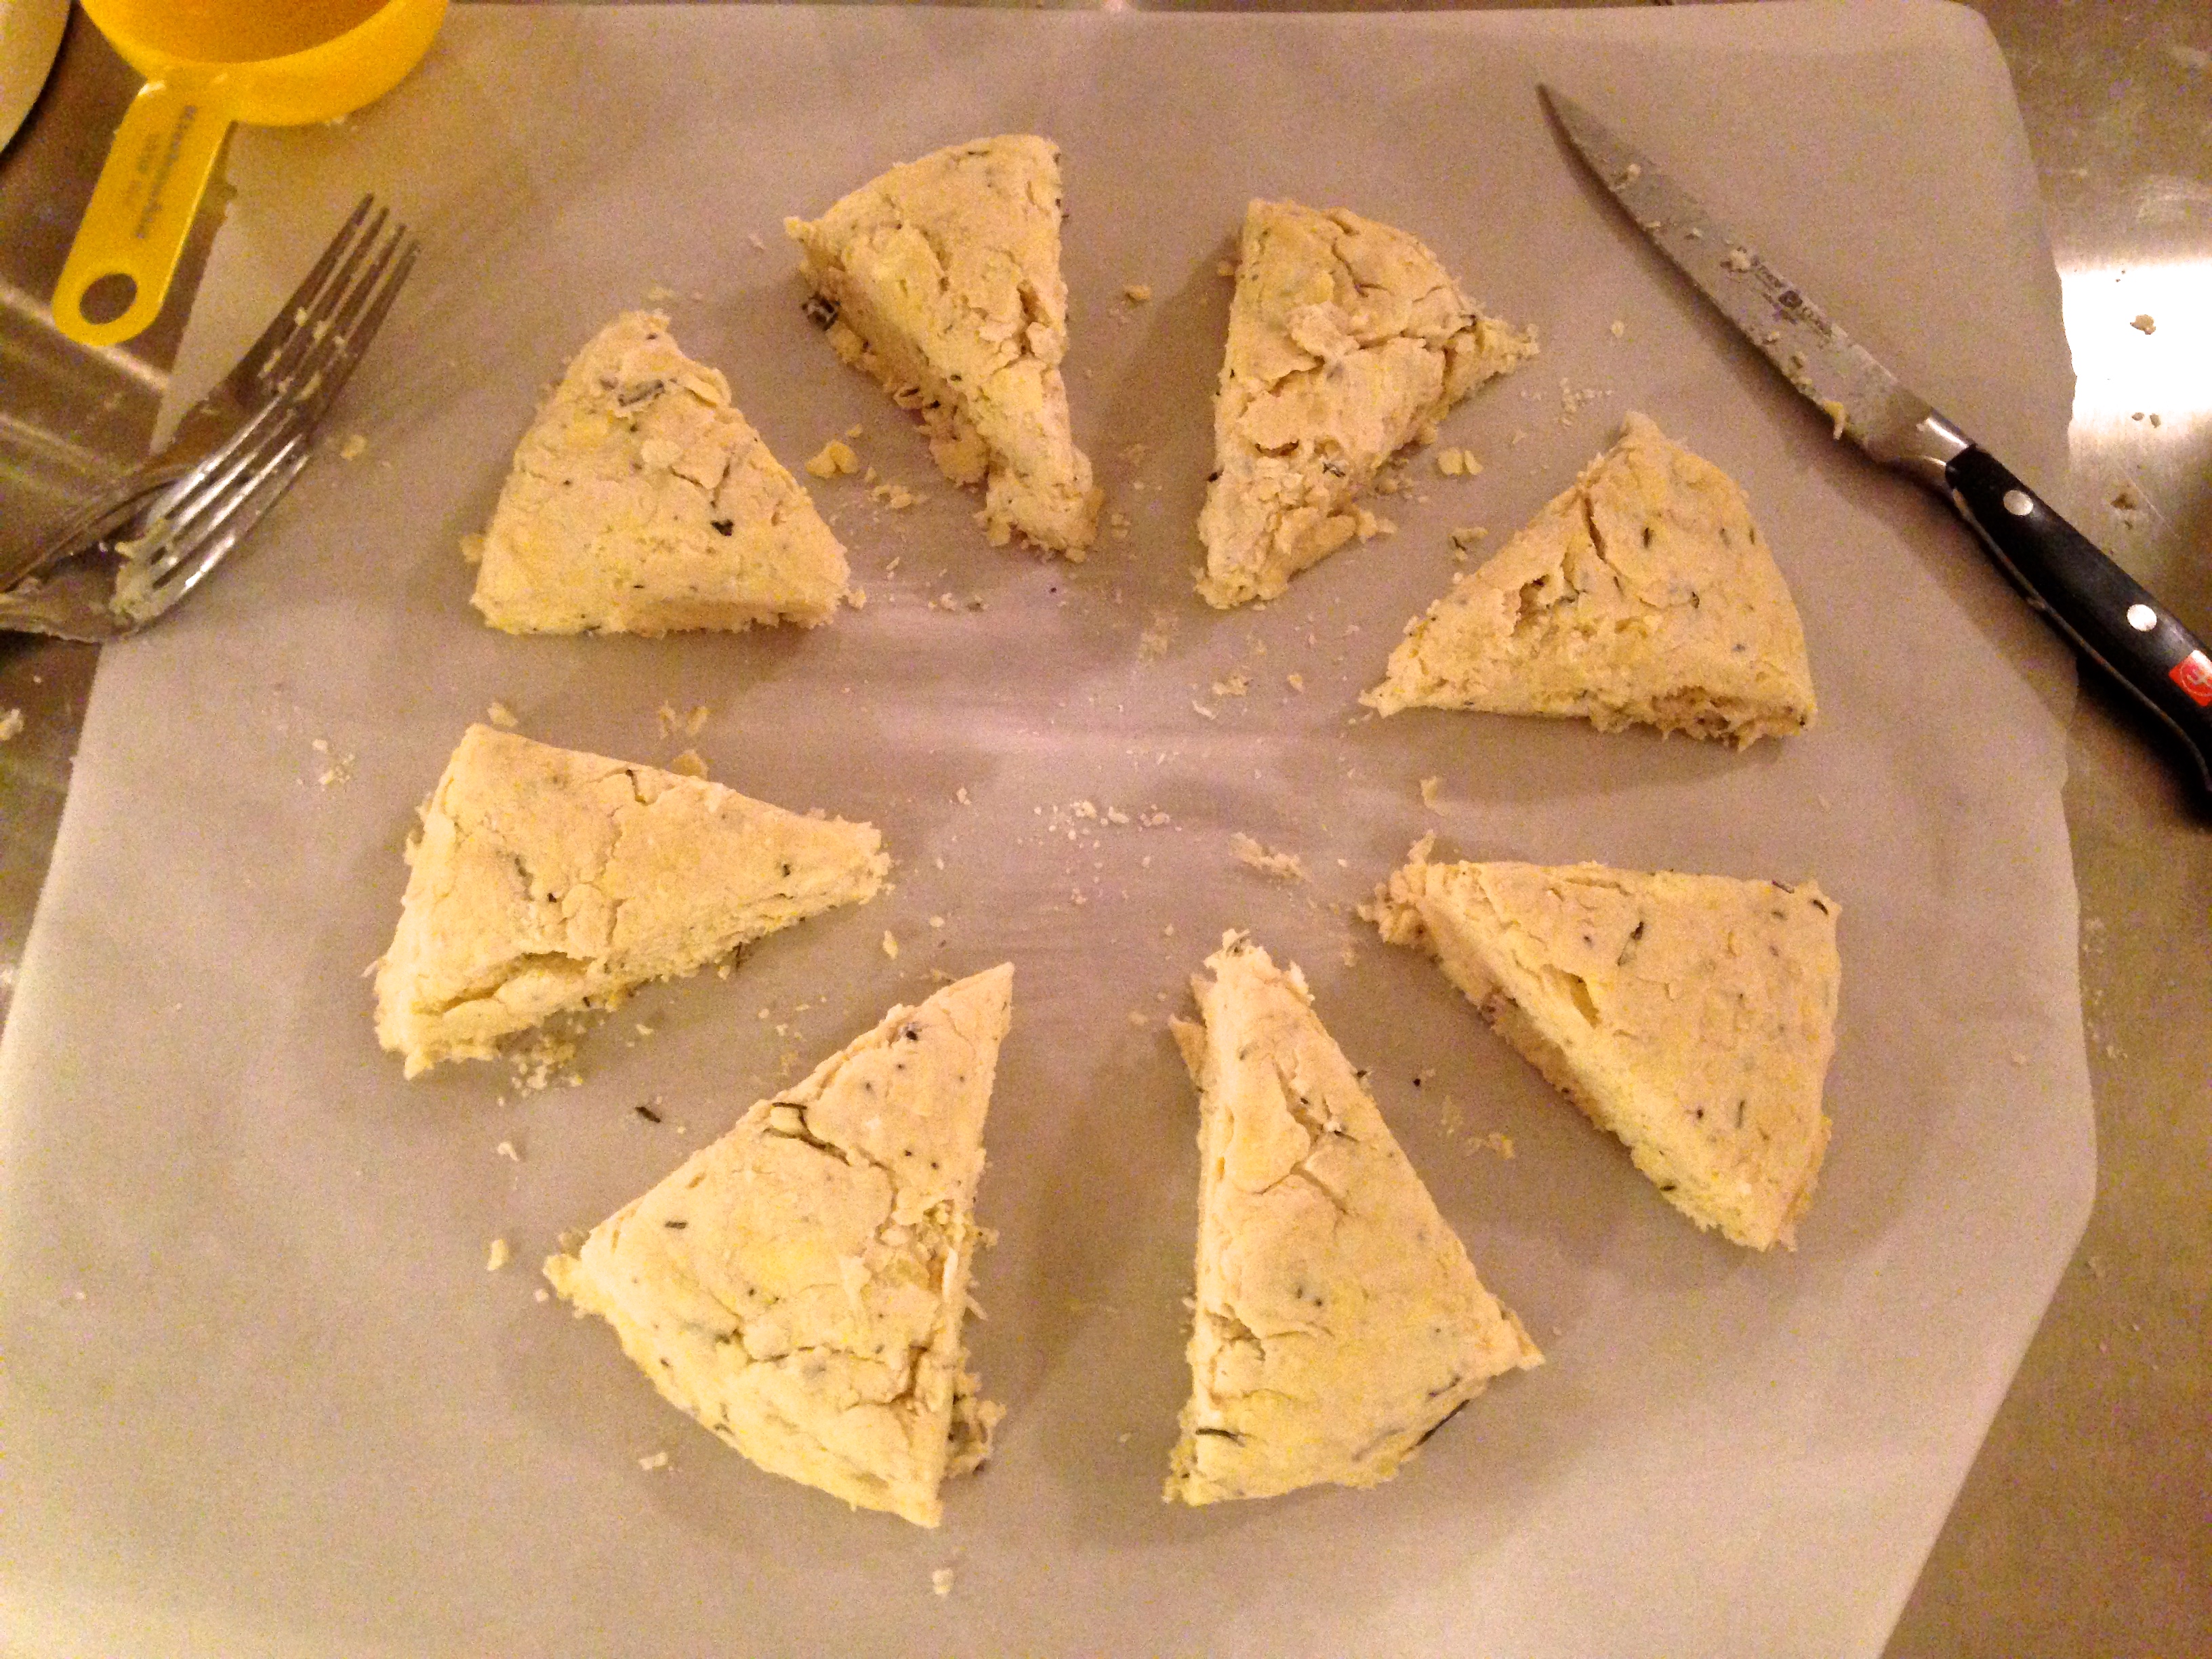
My wedges started coming together much easier on the last batch.
Below I have provided the basic scone recipe that I used for this week’s post and the two flavorful adaptations I tried: apricot-ginger and asiago-rosemary.
Best-Ever Scones
(From Southern Living)
- 2 cups all-purpose flour
- 1/3 cup sugar
- 1 tablespoon baking powder
- ½ teaspoon salt
- ½ cup cold butter, cut into half-inch cubes
- 1 cup whipping cream, divided
- Wax paper
Preheat the oven to 450°. Mix the first four ingredients in a large bowl. Cut the butter into the flour mixture with a pastry blender (or two forks) until crumbly. Freeze for 5 minutes.
Add ¾ cup plus 2 Tbsp. cream, and stir just until the dry ingredients are moistened through.

The asiago- rosemary scone dough.
Turn the dough out onto wax paper and gently press or pat it into a 7-inch round (mixture will be crumbly). Cut the round into eight equal wedges. Place the wedges 2 inches apart on a lightly greased baking sheet. Brush the tops with the remaining 2 Tbsp. cream just until moistened.
Bake at 450° for 13 to 15 minutes or until golden.
Variations
Sweet Apricot-ginger Scones:

Apricot-ginger scones after baking.
Stir in ½ cup finely chopped dried apricots and 2 Tbsp. finely chopped crystallized ginger with the cream. (Don’t be afraid to add a little bit of extra apricot or ginger. The flavor is wonderful!)
Savory Rosemary, Pear, and Asiago Scones:
Omit sugar. Stir in ¾ cup finely chopped fresh pear, ½ cup grated Asiago cheese, and 1 tsp. chopped fresh rosemary with the cream. (I omitted the pear in this recipe, added a bit of extra grated cheese and chopped rosemary to the dough, and then sprinkled even more asiago on top to make a nice crust.)
So how do you like your scones? Lots of add-ins? Served with jam and butter?
Sources
-
Phillips, S. (2000). Mixing Method – Cut In or Cutting In. Crafty Baking. Retrieved from https://www.craftybaking.com/howto/mixing-method-cut-or-cutting
-
Castro, J. (2013, September 17). What is Gluten? Live Science. Retrieved from http://www.livescience.com/39726-what-is-gluten.html
-
Moskin, J. (2014, February 25). Biscuits and Scones Share Tender Secrets. The New York Times. Retrieved from http://www.nytimes.com/2014/02/26/dining/biscuits-and-scones-share-tender-secrets.html?_r=0
-
The Difference Between British and American Scones: Test Cook Andrea Geary Explains. (2015) Cook’s Illustrated. Retrieved from http://www.cooksillustrated.com/features/8521-the-difference-between-british-and-american-scones-test-cook-andrea-geary-explains